Know how to set up a hillary tent in the easiest way possible.
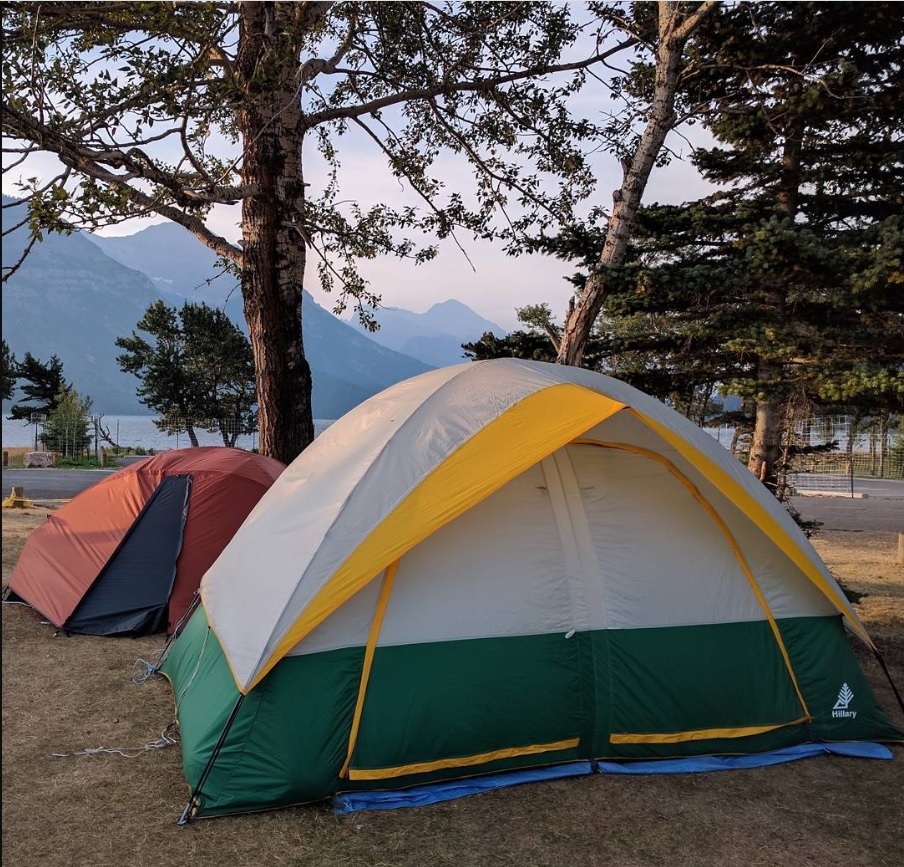
A coveted hike in the mountains or that weekend escapade that you were planning to have with your folks into the green wilds long due, is incomplete without the perfect amenities. If you yet to decide upon the best possible tents you should purchase to have a comfortable night out in the midst of the forests; we have the answer for you. Well, the best possible solution to your query can be the Hillary Tents or better known as the Hillary Camping Tents.
It can render you the luxury as well as space for a comfortable accommodation for your entire clan! However, one needs to be adept at how to set up a hillary cabin tent, as they are indeed quite substantial in size and capacity.
Hillary Tent Set Up Quick Guide
If you’re in hurry, then here’s a sweet and simple quick guide on how to set up a hillary tent within few minutes. You just need to follow these steps one by one and you will be able to do it without any trouble.
- Step 1:Select a Suitable Place
- Step 2: Staking the Tent Right
- Step 3: Congregate the Poles
- Step 4: Adjustment of the Poles
- Step 5: Assorting the Remaining Poles
Hillary Tents: Uses & Purpose
The main purpose of the Hillary canvas tents was to encourage family camping as these structures were so built that it could house a large number of people and even provided separate sections or rooms inside the tent. This brand was one of the very first to have evolved these kinds of cabin style instant tents with much more interior space.
There are separate techniques and procedures for hillary tent setup, and proper care should be taken while staking it as the extensive size might render it incapable of standing strong in the strong winds. Let us help you to learn how to set up a hillary tent in the next section.
How to Set Up a Hillary Tent for Beginners in 2021
If you follow our guide on how to set up a hillary tent, then you will be able to find success in it. You just need to implement all the steps correctly, and you are sorted.
Step #1:Select a Suitable Place
Before setting up your camp, be very careful to choose a proper place for the build. Select a dry, uniform area that is devoid of shrubs, rotten debris as much as feasible. Stay clear from the places that are totally exposed or which are on the slope, where probabilities are high of your tent getting washed away with a heavy downpour. The place you are choosing for your tent much be sizable enough to layout your spread along with fire and all the cooking arrangements.
Step #2: Staking the Tent Right
It is a very first step in establishing a strong hold and the strength of the tightly held tent prevents it from collapsing or supports it against strong winds. Always try to use a minimum of four stakes or even more as it is prudent to use an additional number of stakes to give extra strength. The stakes should be inserted in the loops made at every corner with such tightness that they do not come off. You can learn how to stake a tent from our site as well.
Step #3: Congregate the Poles
While choosing the ones for your tent, be careful and look for some uneven poles as well as that are complementary in shape and size. These two categories of poles should be fitted in such a way so that the dissimilar ones are attached at the end of the matching poles. The ridge pole supports the roof of the tent, and the pole sleeve should be placed such that it runs through the middle of the tent
Step #4: Adjustment of the Poles
The proper adjusting of the poles should be done with much precision. First, the curved poles are rolled over the ridge pole and on accomplishing it the loop that was there should be taken to the pole end with adjusting it in such a manner that it holds the two intact. The angled poles should be inserted through the loops at the end of each wall. Following which, the smaller poles should be put along the angled poles that eventually be inserted in the curved pieces by the ridge.
Step #5: Assorting the Remaining Poles
At this point, whatever number of poles is left out should be taken and the thinner ones should be separated from the thicker ones. Then the slender poles should be inserted into the broader ones in order to make two long poles. These poles should then have to be inserted into the angled ends as previously done in the preceding steps. This entire procedure shall give a rectangular structure to your tent.
If you follow our hillary tent setup instructions properly then you will be able to put it up without much hassle. Still if you face any difficulties, feel free to ask us in the comments below.
Final Words
Hillary tent models have made it possible for so many people to relish family time together in the tranquilly and the quietness of nature. These tents are mainly manufactured by three companies, and they are primarily sold through Sears. They are available on a variety of sizes, designs and at affordable pricing. Hence, with the help of these guidelines, you together with your buddies can put up a hillary tent with ease and enjoy the camping!
As you now know how to set up a hillary tent in easy way, don’t suppress your adrenaline rush much. Call your buddies, plan a trip, and treat your body with the vacation it deserves.
- Freediving Fins vs Scuba Fins: A Detailed Comparison - February 21, 2022
- How to Use Hammock Straps (A Step by Step Guide) - February 21, 2022
- 8 Best Places to Fish in Ohio (With Complete Details) - February 20, 2022