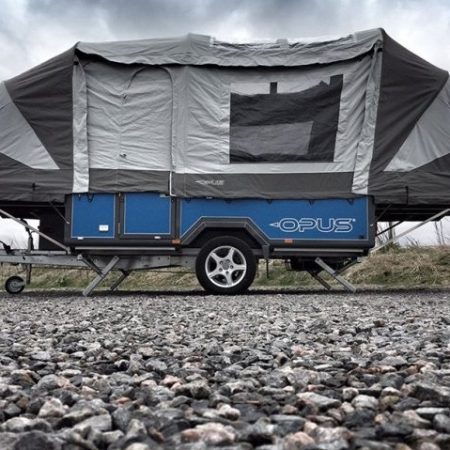
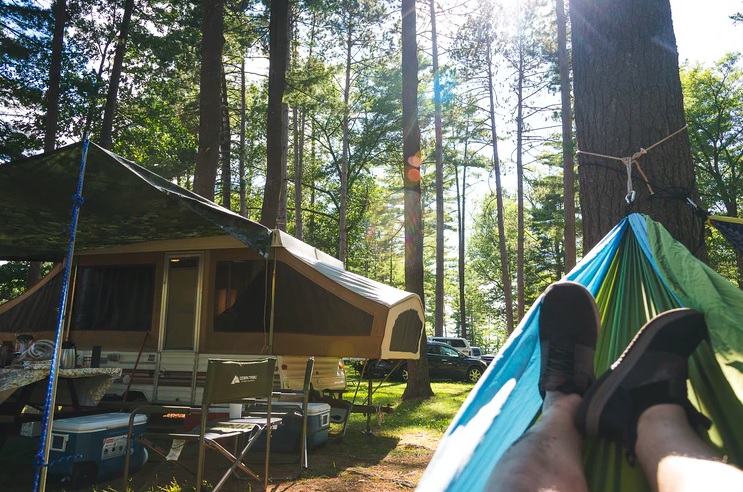
Learn how to set up a pop up camper in easy-to-follow steps even if you are a first timer.

Sometimes after working in offices for days, we get tired, and it becomes necessary to relax. Travelling is one of the best ways to regain energy and motivate ourselves.
However, many among us are incapable of affording luxurious hotels. In such a situation, pop up campers can be of great help. Besides, many also love to spend their vacation in their way. For both cases, pop-up campers can be handy.
However, many do find it hard to set up, as there is no absolute guideline available on how to set up a pop up camper. Even if there are some, those are difficult to understand.
For me, owning a trailer has made it a lot easier to know how it works. So without any further delay, we should start with some basics of setting a pop-up camper.
Are Pop Up Campers Hard to Set?
No, they are not hard to set up. However, you may find it little difficult if you are doing it for the very first time. In fact, for me it took nearly 2 hours to excel the process. But. you don’t have to worry much, as I will be sharing some simple hacks in this article. If you follow the steps mentioned here to the core, it will be a cake walk for sure. Now, let’s get started with the actual process.
How to Set Up a Pop Up Camper (Exact Step-by-Step Guide)
Find the Right Place
The positioning of the camper is of extreme importance. As we mostly plan to stay for a couple of days, we should ensure the ground’s leveling. Otherwise, the camp might trip over, and there could be some severe injury. It is always best to set the camper in an open space.
Having trees or bushes adjacent to it could cause difficulties in roaming around. However, placing the camper at the right spot for the first time could be a bit difficult. To make sure of the positioning, starting with a piece of plywood to mark the right place would be good.
Then we should gradually drive the camper over the blocks and secure the wheels. The mode of securing the wheel may vary from the soil’s condition, the land’s slope, and many other factors. I prefer to keep handy a few types of wheel locker and use it accordingly.
Leveling the Camper
The next step of how to set up a pop up camper is to level the camper. For this, we start rolling the tongue jack; we can find those in the front of the trailer. Well, the placement of the tongue jack would vary from one model to another.
So before starting with the installation, we should check out its positioning. Rolling this tongue jack ensures a proper leveling of the front to back, side to side, and raise the camper.
However, it can also lower the level down using the same jack and adjust accordingly to get the perfect leveling. Next, we have to turn on the stabilizer jacks. Again, to secure camper installation these work perfectly.
We can find those at the corners of the campers. However, we should not confuse these jacks with the previous ones. The functionality is different. For a better ground gripping, these are used. So to use it, we should roll it down all the way until it reaches the ground.
This helps to avoid any bouncing or shaking of the camper while using.
Wiring System
Proper installation of electricity is vital. So if our camper is equipped with one of those, we must utilize it. However, the plug wire of the camper may vary from one to another. Some campers also come around with an air-conditioning system, which is excellent if you are camping in a hot area.
Lifting the Roof and Setup

There are latches on the corners of the camper, which we need to open before lifting the roof. We should take out the crank opener now and fit it inside the crank, and roll it.
There should be enough space above and around the roof to open it properly. Having any obstruction can interrupt the proper installation. We should roll it till the top is set correctly and reaches its ultimate height.
To make sure if the roof is properly lifted or not, we should check the tension cable along the campers’ sides. When those cables are tight, we should be sure the roof is set.
Setting the Bed
Now, in some campers, these beds are zip locked. We would need to open those zips and then pull out the beds straight from the front and the camper’s back. If the beds do not come out smoothly, we should not force it out as it can damage the bed or the sleeping bag and the camper.
Instead, we should make sure nothing is obstructing the beds from coming out.
Safety Supports
The safety supports are essential and are placed at the two opposite sides of the roof. After the roof supports, we should bring out the bed supports and then put them between the bumper and then underneath the bed into the clip or the receiver. Zip all the zippers and Velcro in and out of the camper.
Installing the Door
Then, we should get into the camper and look up into the ceiling. There is the door. After carefully unlocking both the ends out of the safety straps, we should position the door rightly from inside. We have to block it by sliding the door through the open space.
However, the door should slide smoothly and fit in the track. Now, to complete it, we must lock all the latches rightly. Now secure all the area around the door with Velcro.
Tension Cords
After completing the door, we should check out for all the tension cords and the zippers. Ensure the camper is set up properly from outside, and every cord is in its place.
Interior of the Camper
Campers come up with varieties of designs, which changes the interiors. Generally, a burner or furnace is set up in the kitchen area, which remains adjacent to a pre-designed sink. I prefer to cook outside sometimes, so I use the other oven coming along with it.
Setting up the Furniture and Other Equipment
Once we complete arranging the cooking utensils like camping plates and other things, we can check out the sitting arrangement. There could be more than one dining table. If there is, one is pre-installed while the other one is needed to be installed.
However, after completing the dining area, we should also make sure to check all the other equipment, whether they are correctly placed or not.
Water Supply
For the water supply, we would need to open the water hookers. Again the positioning of those could vary from one model to another. However, you will get two adjacent hookers, one for the water supply and the other for draining out the dirty water.
All we need is to fit the city water supply hose into the fitting, and we are good to go. We have to open the drain line for the water drainage so that sink water can directly get out. Attach the pipe properly, so that filthy water gets out directly.
However, make sure the water is disposed of according to the rule.
If there is no such facility for running water, we can fill the water tank and use it. The campers equipped with a propane tank must be turned on. This will help to run the refrigerator smoothly.
How Long Does it Take to Set Up a Pop Up Camper?
Completing all these might take half an hour (30 minutes) during the initial period. Once we get used to it, ten to fifteen minutes is enough to complete the whole process. However, if you set the camp in a pre-booked campsite, it will take less time than in an open space with no paid facilities.
Some Useful Tips
Carrying an Extra Bucket
Many times, we prefer cooking outside because of the smell, smoke, etc. It becomes challenging to get into the camper and wash the hands every time. Therefore, it is convenient to carry an extra bucket and use it to wash hands while cooking outside.
Having a Cooler
Traveling to some hot and humid place would require us to bring a separate cooler. Although it works fine, the refrigerator does not keep the beverages or food items cold for a longer time. It somewhat keeps them fresh, but to get the chilly feeling, we should carry a cooler.
Parting Words
Vacationing with loved ones always helps and strengthens our bonding. A mere escape to the wilderness sometimes makes us aware of our origin. Having a camper thus can contribute in many ways besides boosting your lungs with some fresh air. I hope now you know how to set up a pop up camper, so complete that long due trip right now.
- Freediving Fins vs Scuba Fins: A Detailed Comparison - February 21, 2022
- How to Use Hammock Straps (A Step by Step Guide) - February 21, 2022
- 8 Best Places to Fish in Ohio (With Complete Details) - February 20, 2022
